Your Quartzy Inventory is a place where everyone in your lab can keep track of everything that belongs in it. That includes chemicals and glassware that you purchase as well as plasmids and primers you create in the lab. Keep track of everything in one central location!
And you can track multiple locations, lot numbers, and expiration dates with item instances.
Table of Contents
Add an Item to the Inventory
1. From the Inventory module, click Add Item.
Note: If you're in multiple Labs, when on the All Labs page you'll be prompted to select the Lab where the item will be added.
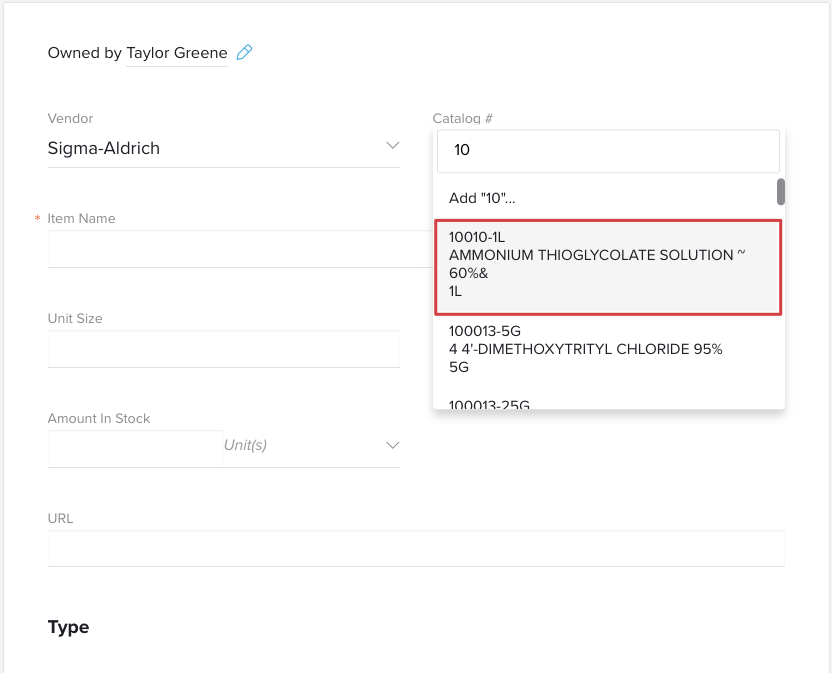
2. Enter a general search term (product name, manufacturer #, CAS #, etc.), or a specific Vendor + Catalog Number. Or, click Skip Lookup to enter the information manually.
3. When there is a match for the search, options will appear below. Enter the quantity that you currently have, and click Add.
4. Optionally, enter information about the item's Type, Location, and specifications.
-
The item Type will default to General Supply. Select a different Type from the list if it should be categorized differently.
- Click Add [Type] Details to fill out data specific to the Type.
- Link: Click here to learn how to customize Types from the lab settings
- The item Location will not default to a selection. Select or enter a new location, if needed.
- Click Upload File to attach a file to the item, such as the SDS form.
- Click Specs to fill in the Expiration Date, Lot #, and CAS #
Tip: Custom Type Fields can be marked as required. Click here to learn more!
Note: The Unit Size field is customizable, whereas the Amount in Stock Units is selected from a dropdown menu. The available unit options are: aliquots, ampules, bags, boxes, bottles, canisters, cases, drums, kits, packs, plates, racks, rolls, samples, sleeves, tubes, units, vials, µg, mg, g, kg, pmol, nmol, µmol, mmol, mol, oz, lb, µL, mL, L, fl oz, gal, mm, m, in, ft, yd.
Example: 18 bottles are in stock. Each bottle is 100 mL.
5. If you'd prefer not to use the Search feature, select Skip Lookup before searching.
Or, if there is no match for your search, select Use Add Item Form to be directed to a blank form where all request details can be entered.
Type the name of the vendor who supplies the item you'd like to add. If the vendor has given us access to their catalog, when you type the catalog number, some fields on the form will auto-complete for you!
If the fields do not auto-complete, simply enter the details in the required fields manually. (Required fields indicated by a red asterisk *)

6. Click Add Item.
Add an Item Instance
New item instances can be created from the Item Details Page, from the Receiving page, or when adding a new item to the Inventory.
Create a New Instance From the Item Details Page
- From the Inventory module, click on the name of the item for which you'd like to create an instance.
- Scroll down to the Item Instance Details section and click Add New Item Instance.
- Enter the relevant details for the new instance, such as lot number, expiration date, quantity, and location.
- Click Create Instance.
Create a New Instance When Receiving an Item
Item instances will be created automatically when receiving a requested item and adding it to the Inventory.
- If the combination of the location, lot number, and expiration date fields matches an existing instance, the quantity will be updated when receiving
- If the combination of the location, lot number, and expiration date fields does not match an existing instance, a new instance will be created automatically via the receiving flow.
Create a New Instance When Adding an Inventory Item
- In the Inventory module, click Add Item.
-
Search for an item or click Skip Lookup to use the item entry form.
- Enter the item details and click Add Item.
-
If the amount in stock, location, lot number, or expiration date fields are filled in, an item instance will be created automatically.
Next Up: Learn how to upload inventory to Quartzy via Excel
Comments